Introduction:
This blog is the first in the series that I intend to write for Hack The Box retired machines.
The purpose of this blog is to document the steps I took to complete hacking tasks of Jerry and guide people looking to practice their penetration testing skills.
Tools Used:
Nmap
msfvenom
Netcat
Process Followed:
After connecting HTB lab through VPN, I selected the Jerry machine as it was flagged as an easy target. To check the available services on Jerry, I scanned the machine with nmap using OS/version/script scanning using -A option as follows:
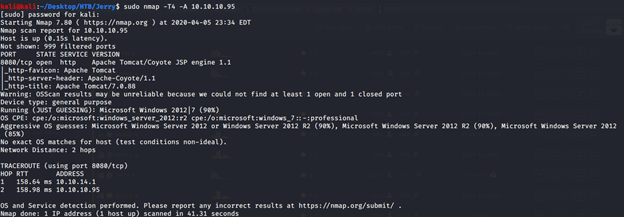
From the scan only one open service was identified at port 8080. Open service at port 8080 was identified as http service running Apache Tomcat/Coyote JSP engine 1.1. Upon visiting the website at http://10.10.10.95:8080, default installation of Apache Tomcat was identified.

It was pretty evident from the website that it was running in Apache Tomcat 7.0.88 in its default state and no customization were performed. To check server status clicked the “Server Status” but and was prompted to enter username and password. Upon entering test credentials, redirected to 401 unauthorized page with the following error:

From the error message collected the default credentials and tried those on the server again and it worked and got redirected to server status page.
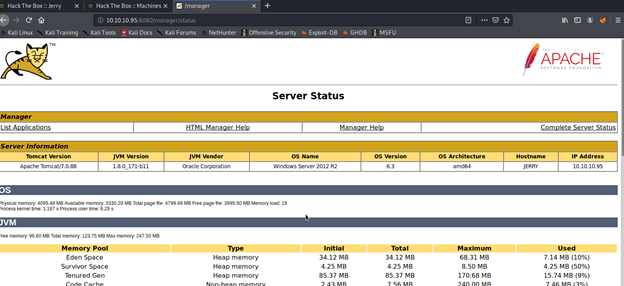
Server status page gave away pretty useful information (service/JVM version, OS, architecture ) that helped greatly in getting shell access to the server. From this page clicked the list application link and noticed the deploy section of the page that allowed war file upload.

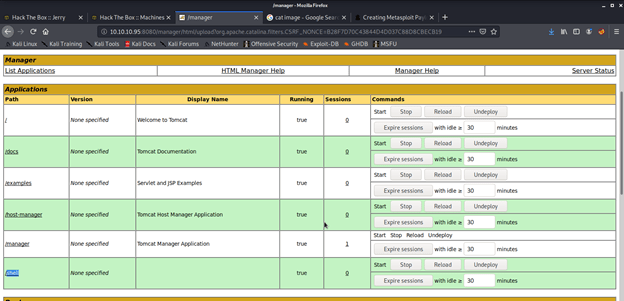
To test the upload feature, tried uploading an image in “.png” format and got error that only war files are allowed.

Browsed to https://netsec.ws/?p=331 to see if we can generate shellcode in war format to get access to the sever. Using the following comm generated a reverse jsp shell to our local host using port 4444.

Uploaded the shell.war file and got the OK message for successful deployment.


Our uploaded file was available on the server that will be used to get a reverse shell from Jerry to complete exploit and get the user and root flags to be submitted on HTB.
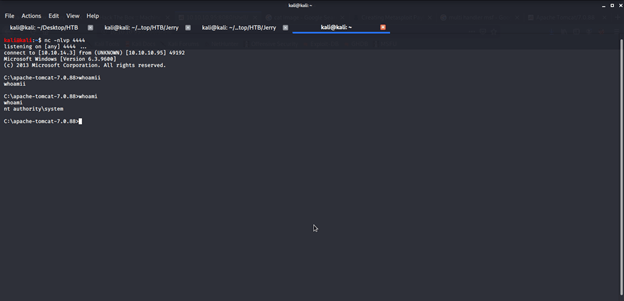
To get a shell from Jerry to our local machine, opened a netcat listener on port 4444.
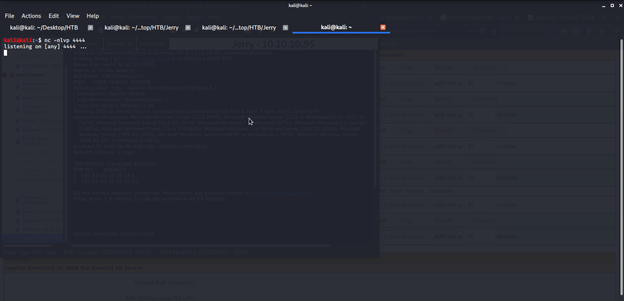
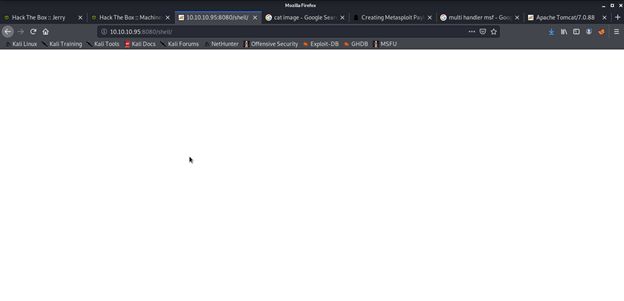
Opened the following link in browser to get shell on my local machine: http://10.10.10.95:8080/shell/
Immediately went back to terminal with netcat listener and there we had admin access to the server.
Browsed different directories to find user and root flags and finally got both flags in one file on Administrator’s Desktop under flags directory.
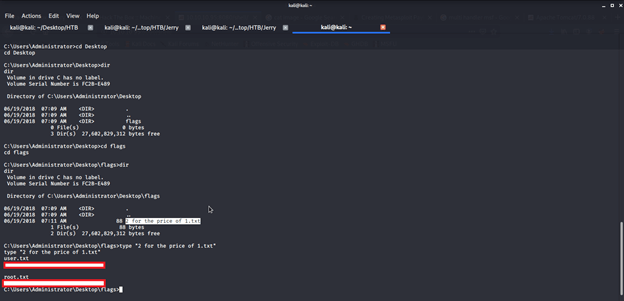
Submitted the flags on HTB website to own user and root and increase our owned machine count.
